FREE Printing & Assembly Tips Guide With Every Purchase!
Printing and construction of your scale model railroad buildings is made easy with the many
helpful demonstration videos and ideas on this website.
There is also a FREE printing & assembly tips manual on your customer download page.
These plans are delivered directly to your computer in the popular PDF format. Most computers already have a PDF reader installed, and you’ll find numerous free PDF readers available if do a quick Google search.
The full range of downloadable PDF plans can be accessed in the various categories featured on the HOME PAGE. After adding the items you want to purchase to your Shopping Cart, simply complete your order. You will then be able to access each plan using the “My Account” tab in the top NAV bar. That’s where you will also access your free printing & assembly tips manual.
OO Gauge / HO scale or N scale
Before selecting an item(s) to purchase simply select either OO / HO scale or N scale. If you choose OO / HO scale then the plans can be printed same size if your are working to OO gauge. There is actually not a lot of size difference between OO and HO, but it’s easy to adjust your printer settings to 87% for the exact HO size conversion. For S scale, simply adjust your printer settings to 118%. If you choose N scale then simply print the plans out same size on your home printer. For the smaller Z scale size you can easily adjust the printer settings to 73%.

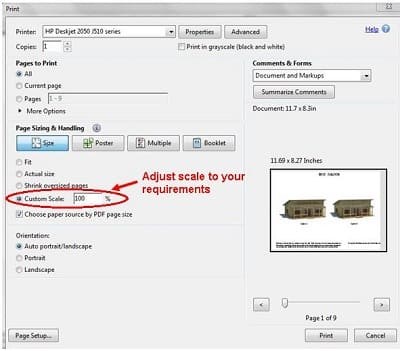
Most home printers let you adjust the custom scale. Remember you are scaling the print settings on your printer and not scaling the PDF file. These printable paper model plans have been designed to fit onto A4 (210x297mm) paper. It is best to use a quality matt photo paper (90 -120 gsm) when using an inkjet printer. Quality copier paper is ideal if you intend using a laser printer. Heavier weight paper is not so flexible and can be difficult to bend, so lighter weight paper is usually the best. Make sure you UNCHECK the ‘Fit to page’ printing option because failure to do this could mean sheets get printed in the wrong scale. These downloadable paper plans are not suitable for scaling to the much larger O scale or G scale as printing clarity will be reduced. O scale plans are available here.
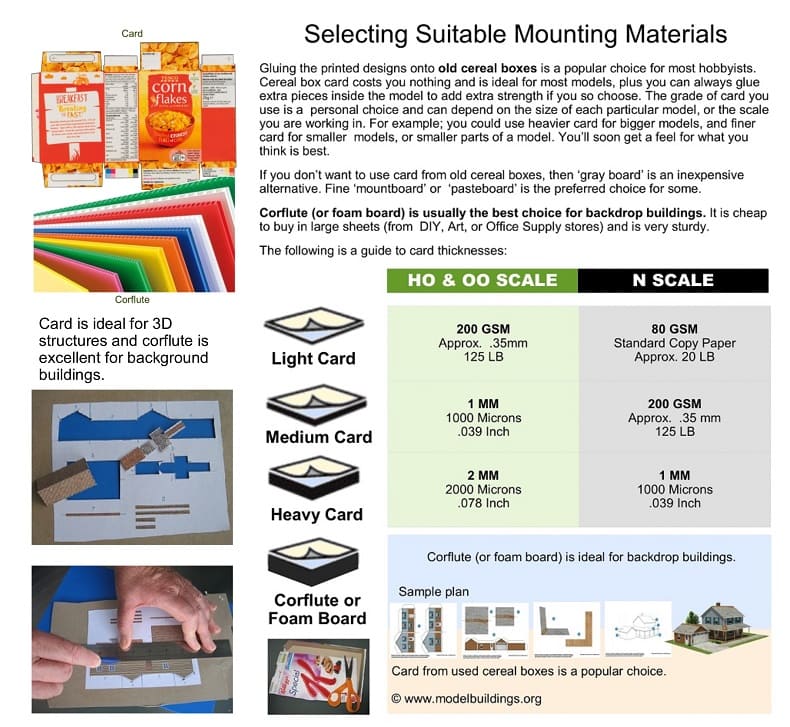
MOUNTING ON CARD
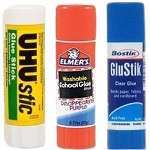
Using a glue-stick (there are various brands) is an easy “non-messy” way to apply the printed paper to card backing. The card will provide stiffness to give the model railroad building strength and help it keep its shape. The cardboard from cereal boxes can be used. You can even use foam board or core flute sheets if you want to.
Before applying the paper to the backing card, apply a light spray of Artist Clear Matt Varnish or Artist Fixative (optional). Artist Matt Varnish (there are various brands to choose from) will help protect the model during and after construction. Varnishing (several light coats) can help seal the structure to protect it from humidity, dust, and fading.
Cardboard from used cereal packs is ideal. Apply the glue evenly to the backing card taking care not to apply it to all areas and not too thickly. An even coat will prevent wrinkles and bubbling. You should be able to gently lift the paper and reposition it before it dries (if required)..
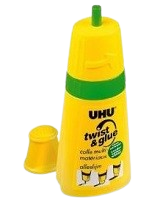
When you are satisfied with the position of the paper on the card backing, carefully roll the paper with a roller or squeegee. If you need to apply thin beads of glue or do spot gluing, then solvent-free glue with a fine tip nozzle (UHU works well) would work best. Otherwise you could use white PVA glue from a squeeze bottle. Remember to press the paper down after gluing to prevent lifting.
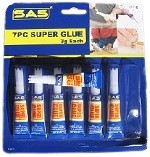
Super Glue is excellent for instantly gluing small parts. Some tweezers are handy for holding the model in place as you apply the adhesive. Be very careful with super glue (read the instructions on the pack) as it dries almost instantly so needs to be kept away from skin. This pack of 7 tubes cost just $2 at a local discount store.
This twin pack of clear adhesive also cost just $2 and was useful to pour around the inside of the model after construction to add strength.
QUICK TIPS
Gently score along the fold lines to provide a clean fold. When assembling small parts (eg. chimney stacks), consider mounting the printed plan on thinner cardboard to make folding easier. Super Glue (because it dries quickly) is handy in areas where joins are difficult to hold in place for any length of time. Use tweezers as a temporary clamp to hold the card while the Super Glue dries. The model can be strengthened after assembly by pouring clear glue on the inside joints, or by gluing cardboard supports inside the model if required.
MORE CONSTRUCTION TIPS
Fold all parts before gluing. Check to see the folded model fits together snugly before gluing. Cut around the model shape leaving plenty of white space. It is usually easiest to score and fold the areas that need folding before cutting the model shape to its final cut-down size. To get sharp folds, use a steel straight edge (a steel ruler works) to apply even pressure along your score line. A pair of thin needle nose pliers might also be handy. Internal bracing using card or foam core as a stiffener will help give strength to your models. You can cut triangular gussets or glue simple “L” shape pieces of card in place. This will help keep the model in plumb. Another idea is to double-up the thickness of the card walls by gluing another layer of cardboard inside the model.
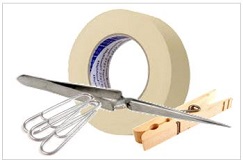
Avoid the temptation to rush the assembly especially when gluing parts together. Don’t just form the railroad building by dropping a few droplets of glue and hoping holds and keeps its shape. It is usually best to glue one seam and then let it dry before gluing another seam, because this prevents the joins from moving when the glue is still wet. Having one strong solid seam will help the others fit tightly into place properly (without moving). So, take you time and you’ll get a better result. Paper clips, masking tape, and clothespins can be handy tools for holding a model in place when gluing.
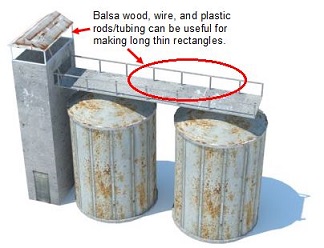
It is not always practical to shape cardboard into very long thin shapes, so materials such as balsa wood, wire, plastic rods and tubing can be very useful for making posts, beams, railings and building supports. In some situations clear acetate can be used to replicate glass. Just use your imagination to add your own finishing touches. Paper clips, masking tape, and clothespins can be handy tools for holding a model in place when gluing.
It is not always practical to shape cardboard into very long thin shapes, so materials such as balsa wood, wire, plastic rods and tubing can be very useful for making posts, beams, railings and building supports. In some situations clear acetate can be used to replicate glass. Just use your imagination to add your own finishing touches. Paper clips, masking tape, and clothespins can be handy tools for holding a model in place when gluing.

Some card kit buildings (e.g. silos) need curved parts, for which thinner card is used. To make a smooth curve gently pull the card up from under your ruler.
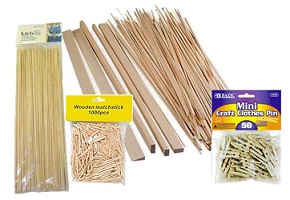
This photo shows items purchased from a discount store. The wooden skewers, toothpicks and matchsticks cost just $2 a packet and are ideal for posts, poles etc. The mini clothes pins (also $2) are perfect from holding the models together when gluing. The balsa wood is soft, versatile and easy to work with. It is can be used inside a constructed model to add support if required. Paper clips, masking tape, and clothespins can be handy tools for holding a model in place when gluing.
This photo shows items purchased from a discount store. The wooden skewers, toothpicks and matchsticks cost just $2 a packet and are ideal for posts, poles etc. The mini clothes pins (also $2) are perfect from holding the models together when gluing. The balsa wood is soft, versatile and easy to work with. It is can be used inside a constructed model to add support if required. Paper clips, masking tape, and clothespins can be handy tools for holding a model in place when gluing.
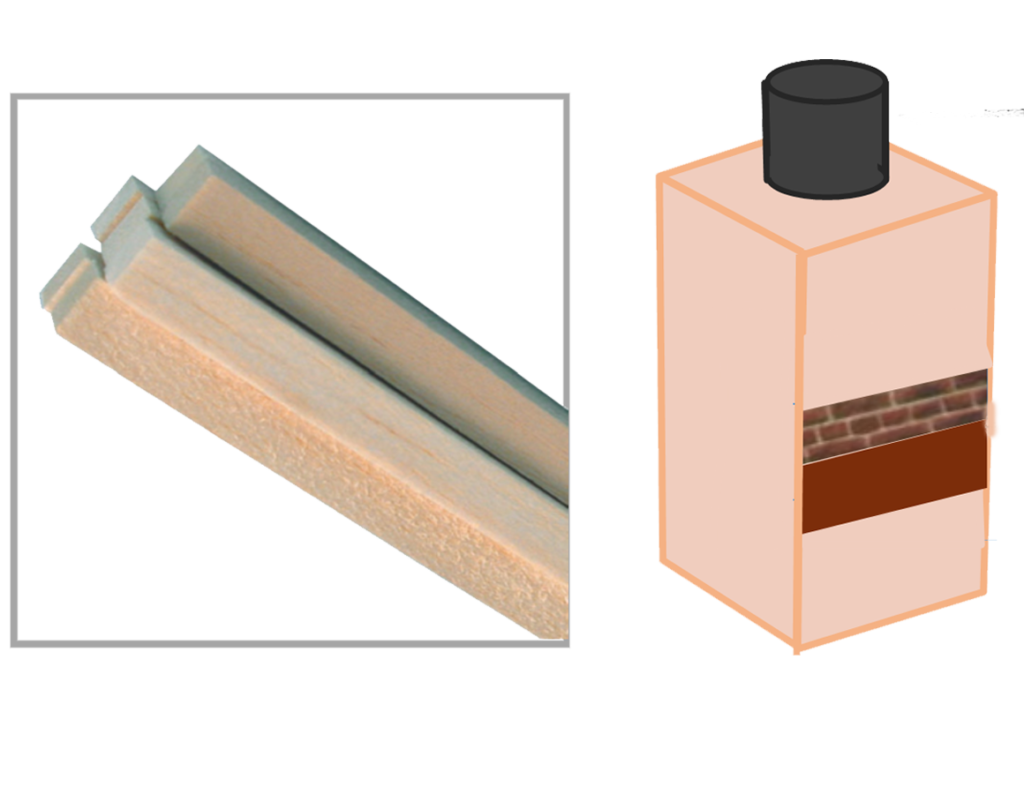
VERSATILE BALSA WOOD
To make a chimney simply use a small block of balsawood, and glue a small rod of dowel or balsa on the top. The rod can be painted black or gray. Paint the main chimney a gray or brick color, or glue a paper print-out of some bricks on to the surface Balsa is an ideal material for making decks, steps, and posts. Popsicle sticks can be used for decking. PVA is a handy wood adhesive.
WEATHERING TIPS
Various methods can be used to weather the model railroad building and give it the appearance of age. One method is to scrape a tiny amount of artist pastels (brown and black) onto a piece of scrap card. Then (using an artist brush) dust tiny amounts onto the edges, corners, and surface of the constructed structure as required. Slowly build up the layers before sealing the structure with another light coat of Artist Matt Spray Varnish (don’t spray too close). Felt-tipped pens can be used to touch-up edges after construction.