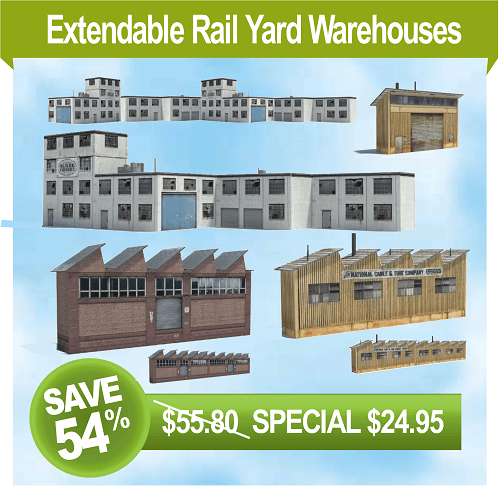
Rail Yard Warehouses Pack Deal
$24.95
COMPLETE PACK ONLYImagine these clever “extendable” rail yard warehouse structures behind your track on your train layout.
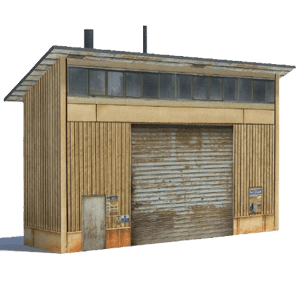
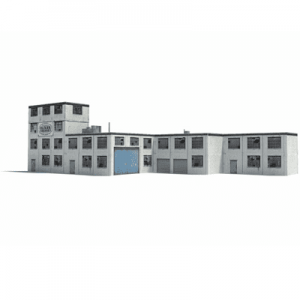
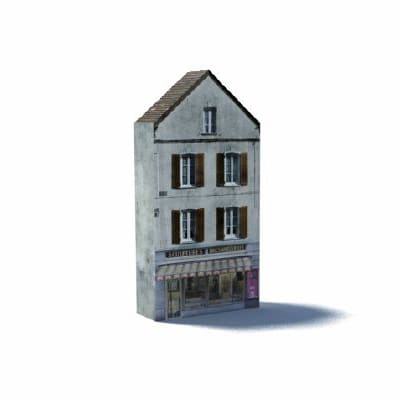
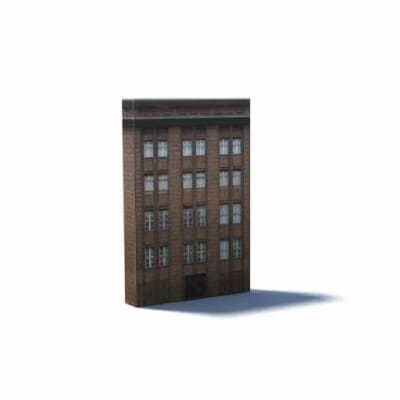
Take a close look at the white scale model railroad structures featured in the discounted pack shown at the top of this page. These white buildings can actually be mix ‘n matched into a variety of configurations to suit the rail yard back scene. The white building on the left can be joined to the white building on the left, or to one of two white buildings in between, so these white model buildings can be assembled and positioned how you want. Clever! You need only purchase one copy of these scale model rail yard buildings to achieve an amazing extended rail yard back scene. All the model buildings for sale are available to OO / HO scale and to N scale. OO plans can be scaled to 87 percent for HO scale and the printing clarity is unchanged.
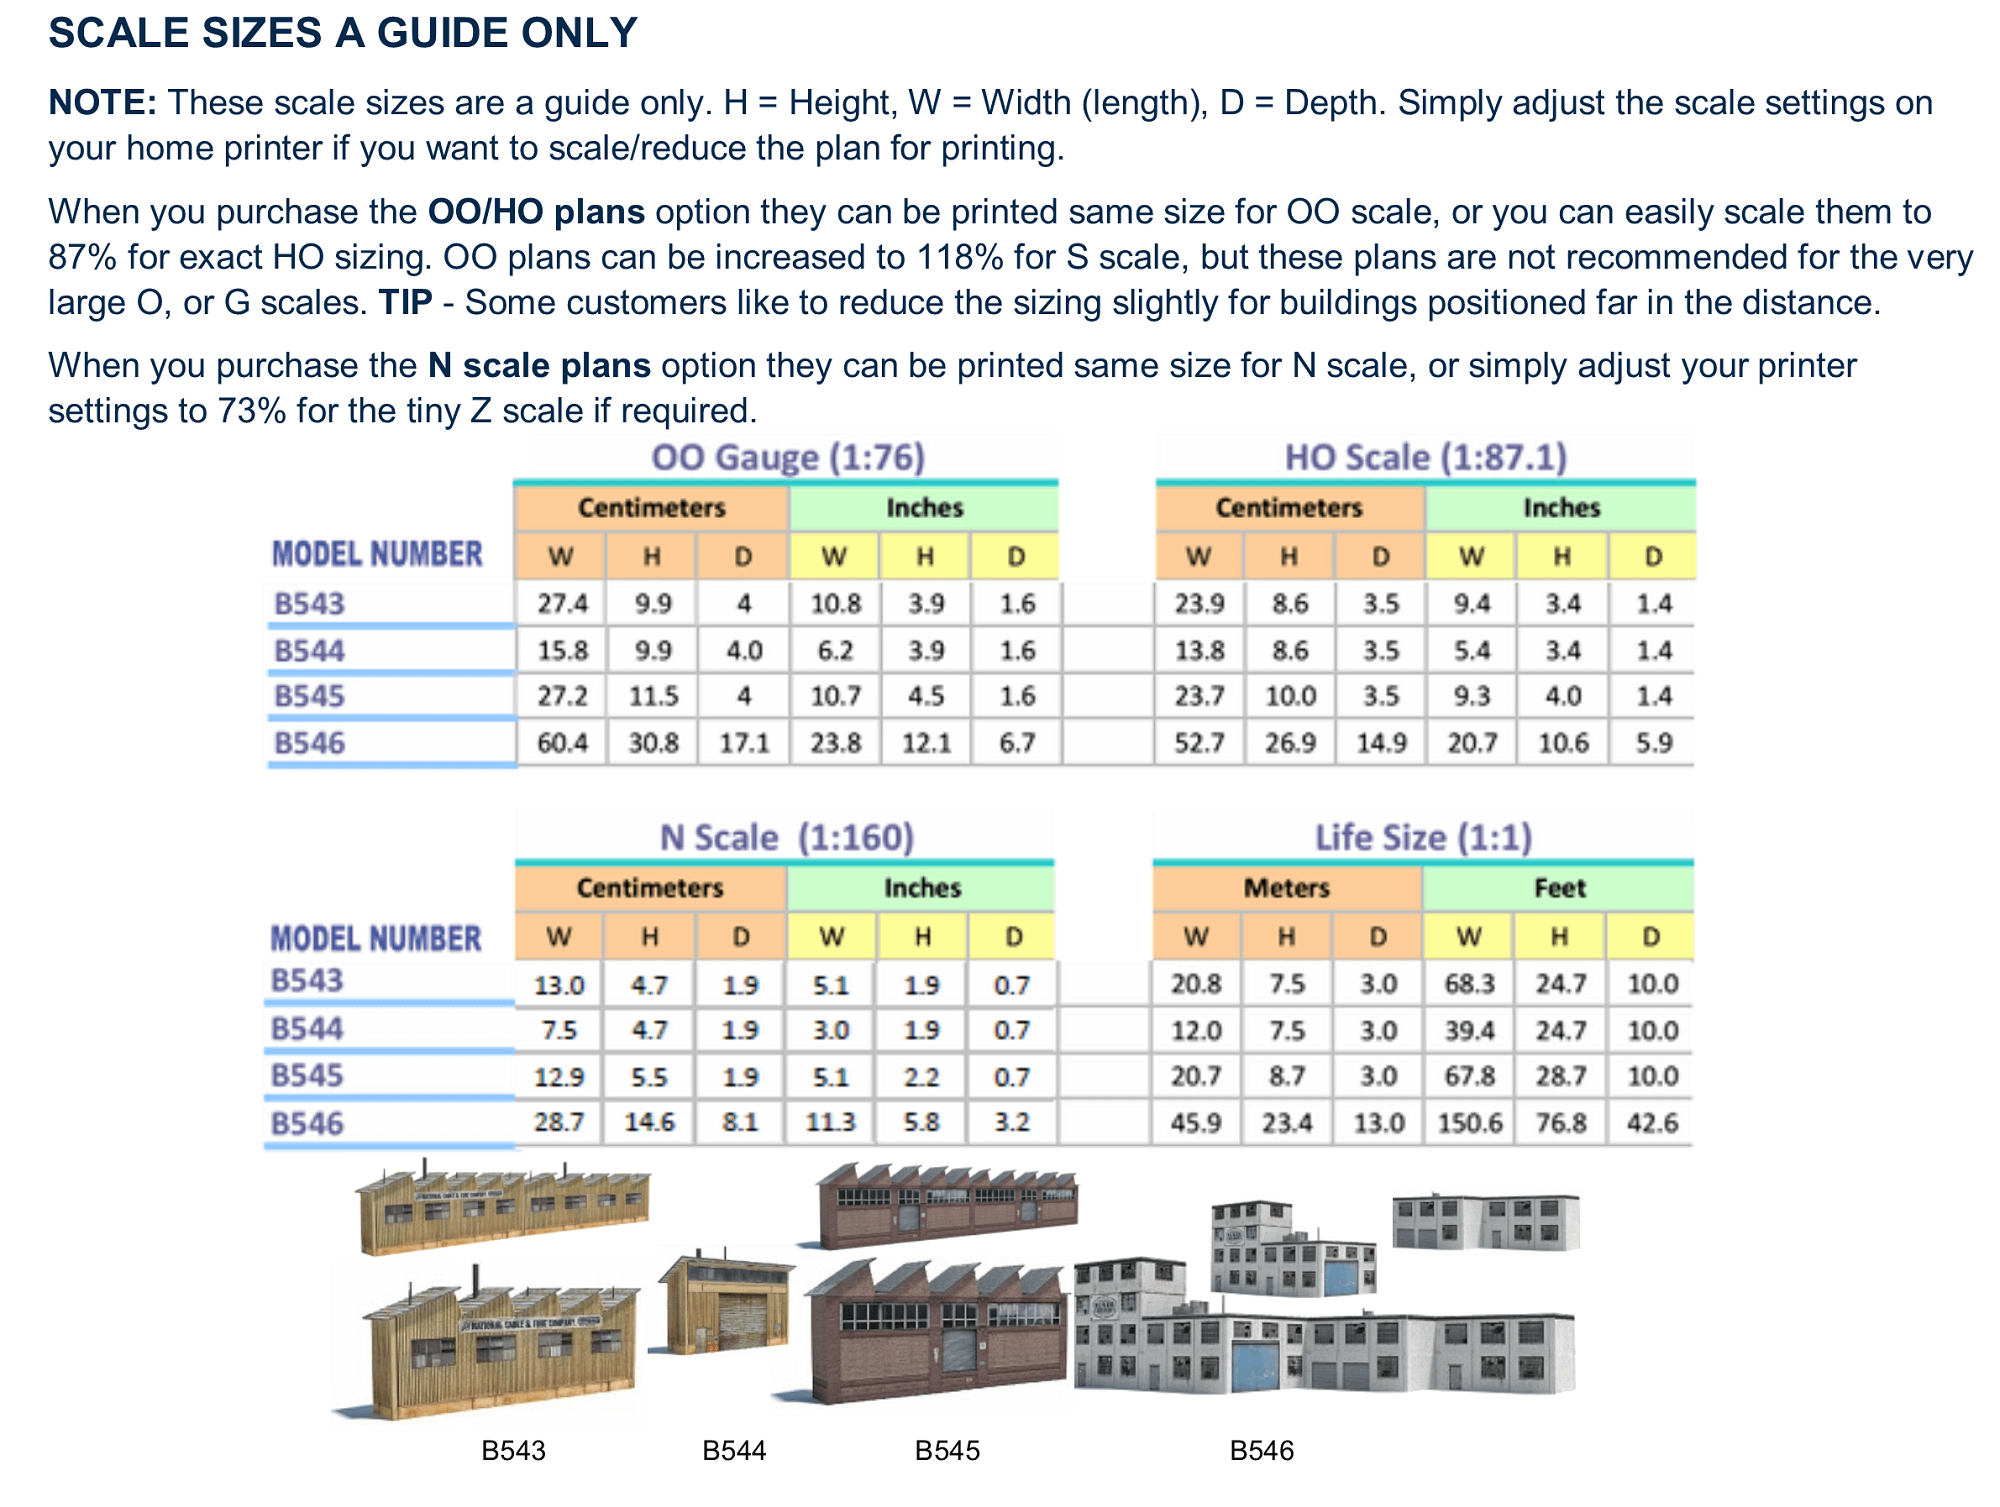
As a guide the approximate dimensions for the B546 tall building with the logo in OO scale is 6.7 inches (170mm) tall x 5.9 inches (150mm) wide x 2.95 inches (75mm) deep. In real life-size terms that is 42ft tall x 37ft wide x 18ft deep. The frontage with the blue door in OO scale is 5.9 inches (150mm) wide which equates to approx. 37ft in real size. There is a scale conversion tool on this website to easily convert the measurements to other scales.
Railway yards are usually an exciting addition to a model railway, because they involve plenty of activity (train movements) and lead to plenty of operational fun, and some frustration at times too. However, that said, rail yards are generally a welcome addition on a railroad and are something your visitors will enjoy watching.
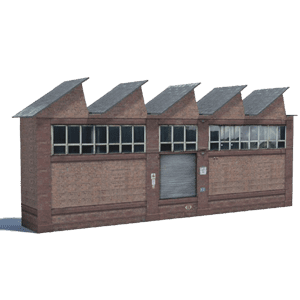
Rail yards typically comprise of several tracks so finding enough room to lay the track can pose problems. It is usually a shame to overly restrict the number of tracks and the length of each track, because that can cause operational problems. Scale model railroad structures can also reduce the space available for operating trains, that is, unless they are wisely positioned and full use is made of “low relief” scale model railroad structures like is featured above.
Rail cars need to be easily transfered from one train to another with having to physically lift them off the track to couple them up to another train. That would defeat the purpose of operating model trains in a realistic fashion like real railroads do.
A better solution to gain more track space and have longer tracks is to minimise the space used up by scale model railroad structures. The easiest and smartest way is to incorporate low relief model railroad structures that fit against the backdrop giving the illusion they stretch to full depth (when actually they are only a few inches deep).
Rail yard structures (like those seen in these download paper plans) will give the appearance of stretching full depth whilst still retaining an exceptionally realistic look. The scale model railroad structures in low relief, won’t use up anywhere near the space required for regular 3D style buildings. As most veteran model railroaders will have discovered; rail yard background scenery needs to provide the illusion of a scene being far larger and busier than it is in reality.
The whole process is easy. All you do is print the design(s) out on your home printer before gluing them to plastic corflute (you can also use foam sheets, or cardboard). My preference is to use corflute, because it so cheap to buy in a giant sheets (DIY stores have it), and it is “as strong as a gorilla.” I paid around 5 bucks for a large 3ft (900mm) x 2ft (600mm) sheet. The store sold larger sheets too.
Follow the drawings that are supplied with the downloaded paper plans … you’ll find them extremely straightforward to understand. Plus customers even get more detailed step by step manual at no extra cost (just in case you need extra guidance or more ideas). By constructing these rail yard structures you will develop into a “master of scenic backgrounds”, because your scale model railroad structures will look so so real!
To add the final finishing touches you can easily make steps, chimney stacks, or platform supports from scraps of balsa wood or plastic.
More Model Railroad Tips For Making Scenery and Scale Model Railroad Structures –
How To Turn Sawdust into Ground Cover For Little Or No Cost
Model builders love to make something out of nothing. We say we are ingenious, others say we are cheap. Whichever, here is a little trial project, if you have not already done so.
Whether your scale is 1/12 for dollhouses, 1/24 for dioramas, or 1/160 for N scale model railroads, we often need grass or weeds for ground cover. This will be a no cost, or low cost, project, depending what you may find around the house. The quantities for this trial are small, but may be increased if more is required.
Things to find –
• Quart jar – A large, clear, glass or plastic jar with lid, like a fruit or peanut butter jar.
• Strainer – A small screen type colander or large tea strainer. About 6” round.
• Plastic Container – Small ones with lids, like butter or sour cream.
• Paint – Small bottle or sample of a grass green, water based, or craft paint. NOTE: Craft paints are water based, mostly non-toxic, and will not normally stain ceramic or stainless sinks and utensils. However, use caution, and use with care, if these items are used by the wife.
• Tea Strainer – A smaller screen type strainer, more fine than the big one above.
• Cake Tin – You spill less with a bigger one.
• Sawdust – About 3 or 4 cups full.
• Old Newspapers – To cover the table and collect spills.
• Pint Jar – Or similar one or two cup size bottle, to mix the water and paint.
• Small Spatula – One that will reach the bottom of the large jar.
• Old Aluminium Foil Pie Tin – To hold dirty utensils.
• Mix the paint – Place about ½-cup water into the pint jar, and add about ½ teaspoon of green paint. Stir to clean spoon. Screw on the cap and shake for a few seconds. The paint should be well mixed, so check the color. Too dark, add more water. Too light, add more paint.
Some words about sawdust – When selecting your sawdust, stay away from that produced from chemically treated boards, as it has been treated to prevent termites and rot, so is toxic.
Also, stay away from exotic, colored, hardwoods, which may have a natural staining and irritating element, when handled. Some woods, such as cedar, have a natural aroma that should be considered before using.
Stain the sawdust – Place about a cup of sawdust into the quart jar, and add the ½-cup paint mix. Screw on the lid and shake. This will take longer than the water as you have to get all the sawdust about the same color.
Place the large strainer in the cake pan, remove the jar lid, and pour the sawdust mix through the strainer. Use the spatula to remove the rest of the sawdust from the jar. The liquid will collect in the pan. Press down on the sawdust to remove more of the paint mixture. Save the paint solution by pouring back into the pint jar and replace the lid.
Dry The Painted Sawdust – Place the empty cake pan in the center of the newspaper and carefully dump the sawdust from the large strainer into the cake pan. Spread it throughout the pan and let dry overnight. You can speed up the dry cycle by using the stoves oven. Pre-heat to 150 degrees and Turn Off the oven. Place the pan in the oven and stir the contents from time to time, until dry. Do not leave the sawdust in the oven if you have to reheat the oven. IF you do have a fire, DO NOT open door!
Store Your Ground Cover – Pour the dried ground cover into one of the small plastic containers, replace top and store. A set of stackable containers is handy when you are
trying to store, and use, your ground cover.
Grade Your Ground Cover – By repeated straining, the painted ground cover can be sorted into several grades, such as, course, medium, and fine.
Take the small tea strainer, add a few spoonfuls of ground cover, and work it around to sift out the smaller pieces, which will fall through into a pan. When all of the fines are through, dump what is left in the strainer into one of the containers; this will be your course.
Repeat with what ended up in the pan. When the fines are through, dump what is left in the strainer into another small container; this will be your medium.
Pour the fines, that passed through the strainer the second time, into a third small container; this will be your fine.
Using Your Ground Cover – There are several ways of applying ground cover to you diorama or layout. Use water based paint of a suitable ground cover, and paints a small area about 12 inches square. Add some of your course green ground cover to the small tea strainer and shake gently over the painted area. For more contrast, you might repeat quickly with the medium grade, to fill in between the larger granules. For more info on classification rail yards.
Add Other Colors – By using different shades of green, yellow or brown you may create a wide variety of ground cover. Dried leaves and clippings may be ground in your own blender, to produce underbrush around trees.
Have fun making your scenery and scale model railroad structures.