Adding Ground Cover To Your Model railroad Scenery – Base and Ground Cover Techniques
There are numerous proven techniques that can be used to add realism and a “natural look” to model railroad scenery. Here are some basics to get you started.
Selecting Your Base Cover
With the topography (hills!) of your layout suitably placed and your track laid, latex paint is your next best friend. Latex can be easily mixed and thinned with water, and should cover every area of ground cover you plan to show on your model railroad layout. Your hills and valleys are going to be made of insulation board or plaster, neither of which comes in convenient ground simulating colors. You need to cover up that pink, blue, and white, with brown, tan, yellow, and green. Nothing ruins realism on a layout like a streak of bonewhite plaster showing through a magnificent stand of trees!
Choose your paint color to simulate the ground appropriate to your location. If you are modeling a desert scene, tan cover makes much more sense than green! Since you are going to cover the paint with some other material, the shades don’t have to match exactly; they just need to blend together realistically. Real ground cover occurs in patches and at random places, so your base cover is a way to tie those patches together. © Copyright http://www.modelbuildings.org All rights reserved.
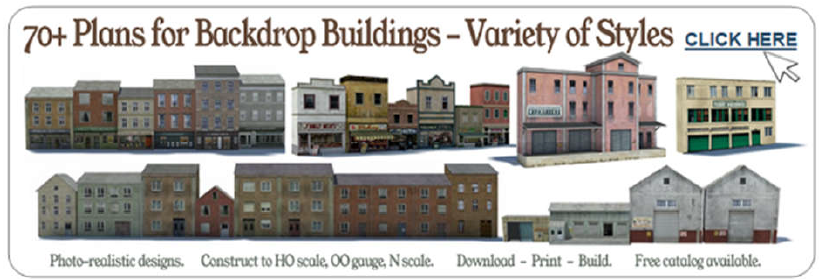
The need for realism does not just apply to making scenery, but also to constructing convincing scale model structures and buildings on a model railroad. The 200+ N scale, HO/OO plans on this website us photographic techniques that really bring the model buildings to life. Apart from looking really convincing, the plans are easy to download, print and build to OO size, HO scale, or N scale size. The completed structure are not only lightweight, but they are also very sturdy and can be easily strengthened by gluing scraps of card inside the completed scale model.
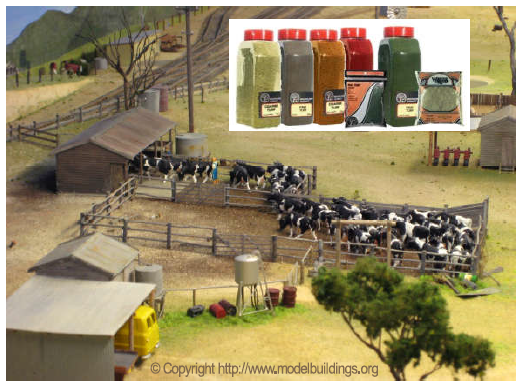
Ground cover is essential to give your layout that look of realism.
Ground cover is a type of material used as vegetation or earth in large areas around your set.
The design of your ground cover can be used to give the illusion of a larger area.
Deciding on what to use as ground cover is as easy as walking outside and looking underfoot. Unpaved areas will be bare earth, grass, weeds, vines, bushes, small trees and perhaps flowering plants of several kinds. Apply what you see when creating your model railroad scenery. Here are some suggestions:
• Bare earth is about the easiest thing to model because you can use actual dirt, however it must be dry and free from bugs and plant life. Sifting the dirt before you apply it is a must to get out the not-to-scale larger debris such as small twigs and stones. Another good idea after sifting is to bake that earth for an hour or so at 350 degrees in the oven to kill tiny plant seeds and bacteria. Let it cool, of course, then apply it over any area that is to be modeled as a bare patch of ground or one that contains only sparse vegetation. Another option is to buy commercial ground cover and glue it in place on your railroad layout.
• Weeds are also easy to model. Any kind of fibrous rope or twine can be used to make clumps of weeds by dyeing pieces of it in various shades of green and yellow-brown, then unstranding it and clipping the small fibers into very short lengths. Use a small drop of white glue to hold them upright, placing them with a small pair of tweezers. It’s fortunate that this technique is so easy, because weeds are everywhere manicured landscaping is not. A realistic layout will have a lot of weeds! Again, you can purchase readymade products for this purpose.
• For large areas of grassy vegetation, ground foam in different sizes and shades of green and yellowgreen are perfect. Ground foam can be purchased from several companies that specialize in scenery modeling. There are also turf mats available which can be cut to shape and cemented in place. Choose the mat carefully. Large areas that are all the same shade and length tend to look like miniature Astroturf. Unless you are modeling a football field or soccer pitch, you might want to add some different shades and kinds of ground cover to the turf mat to break up the monotony.
• Smaller shrubs and other bushy vegetation can be modeled by using tufts of lichen or torn bits of dyed fiber kitchen pan scrubbers. Furnace filter material can also be used. Steel wool is a bit harder to work with and must be painted rather than dyed, but can also serve well for bushes.
Ground cover is almost impossible to overdo. A walk around your neighborhood should give you lots of ideas of how to make your own ground cover realistic. If you have mountainous areas with rocky outcroppings or rock faces, don’t forget to put weeds and small trees into crevices in the rock. Seeds get blown or carried by birds into those places in the real world, so they should appear in your rocky scenery as well.
There are two techniques to adding ground cover. The first is to simply paint the ground with the base color you desire, let the paint dry, then go back over areas about a foot square and spray each area with a mixture of white glue and water (use a spray bottle) or other spray-on adhesive. While the adhesive is still damp or tacky, shake ground foam of appropriate colors, screened dirt, and small clumps of lichen or foam onto the adhesive.
Try to get a light coating of at least one of the ground covers on the whole area. When the adhesive dries, go back over the area and spritz additional adhesive over any ground cover that might not be securely attached with the first application.
The second technique is to use the base color paint as part of the adhesive process. While the base color is still wet, brush on a diluted mixture of white glue and water, or some commercial scenery adhesive such and that offered by Woodland Scenics. The adhesive mixture can be used to thin and spread the paint color, and will provide bonding for the ground cover material. Apply the ground cover as in the paragraph above, then check and re-glue any spots which are not secure
Don’t overdo the ground cover at first. Start with a light coating and see how it looks when the adhesive dries. If the ground appears barer than you like, spray the area with more adhesive and sift on more ground foam or dirt according to your taste. Thinner layers are better and easier to manage than one large deep coat.
On hills and inclines, go carefully so that your material doesn’t migrate downhill into a puddle before the adhesive dries. Here again, building up more light coats rather than one heavy coat is a better method. Patience and attention to detail will bring realism to your model railroad scenery, regardless of whether you are modeling in OO gauge, HO scale or N scale. The same techniques apply.
