
The Easy Method For Using Color-Coded Wires For Model Railroad Electrics
By Kevin C. © Copyright http://www.modelbuildings.org All rights reserved.
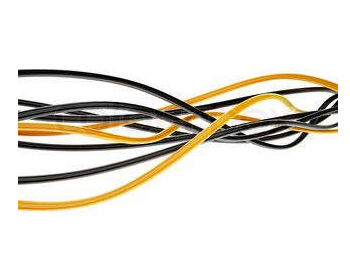
With the advent of electronic circuits being used more and more in model railroading possibly more time should be spent on the setting out of electrical wiring. I have seen under some layouts and would shudder where to start if a fault should occur. All the wires are jumbled up together and nearly all are the same color a wiring on these layouts would have been just added to as time went on. When drawing out your layout you should spend as much time on planning of the electrical circuits, if not more than, setting up the tracks.
The first thing you will need to do is right from the outset once the track plan is drawn out, is then decide where you want the various lights and signals etc. and plan different colored wires for these items. The colors that I use are; solid red and solid white for the track wiring, green, yellow and blue for signals, red with white stripe for positive and solid black for all negative connections. I also put brass bus bars with screw connections every where multi connections will be required (the type used on old switch boards) Brown for signal wires to relays and return via black to negative. Street lights I use blue with white stripe wire and return to negative with black wire. If you make up a color chart as shown in the list below then it will be easier to follow your own system.
Red wire…track} heavy wire
White…track} heavy wire
Green…green signal
Yellow…yellow signal (if used)
Blue…red signal
Black…negative} power -12 volts
Red/white stripe…positive} power +12 volts
Brown…signal to relay
Blue/white stripe…street lights
Green/white stripe…Interior lights buildings
Mauve/purple…road crossing lights
Brown/white stripe…turnout motor straight
Yellow/white stripe…turnout motor curve
All wires returning to negative are black. Readers may make up their own color scheme to suit themselves. I usually put the wiring in place after the track is laid and if you are using an L girder system as a table with narrow sections with the track laid on it then it will be easier to set out and wire the layout without having to get underneath the base board. It can be done from the top quite easily.

I made the wiring into a loom once I had measured the length of the wire and attached the loom to the table framework with aluminium electrical clips and had most things working correctly before I started any scenery. Turnout motors I use CDU capacitive discharge units and triggering these I used either infrared or reed switches with a manual override on the control panel. This is so that the operator can have manual control over the trains.
On earlier DC systems I used to wire the track into blocks and each train had control of the block before it, so that another train could not enter the block until it was clear. A lot of models that I have seen have twin tracks as a double loop so that two trains could be controlled separately of each other in opposite directions. This is what my mate did on a display layout that he set up except it was double figure eight on a nine by twenty meter table.
Set up as a u shaped table. He also had a reversing branch line running two DMU units one unit would come down the track and stop at the last station then reverse back to the starting point where the second unit would run and so on. This was done with commercial electronics put out by Hornby. It also changed the light signals from red to green and vice versa etc. but this unit operates only on DC.
I find DCC is a much easier way to control three four five engines on the layout as long as you can remember the engine address on the controller. A lot of the new stock of Loco’s are coming out as either DC or DCC ready or DCC on board.
However changing an older engine to DCC is not that hard at all but I still let the hobby store do my locos for the main reason they would have the right decoder and if I short anything out then I do not have any comeback and as I say do it once and do it right.
With DCC the rails are alive all the time at 16 volts AC and the decoder picks up the power and converts it to DC to run the engine either forward or reverse and my steam engines run sound with chuffing, long or short whistle, steam valve hiss and bell ringing.
On my layout I run multiple engines on a single track with passing tracks. And this works well as the engines can run towards each other with independent control something that really is not possible on a DC layout. The signal that the controller sends down the rails is digital as a square sign wave so that a different sign wave is generated for each function so each decoder can receive its own set of sign waves that is why one engine will obey one set of sign waves and another engine on a different address will obey sign waves for that address however if you put two engines on the same address they will obey the same set of sign waves or instructions which is handy if you want to run a double or even triple header units.
Some DCC units now have uncoupling functions using KD couplers and also turnouts are being controlled, road crossing lights and signals etc by DCC giving the operator everything at the controller.